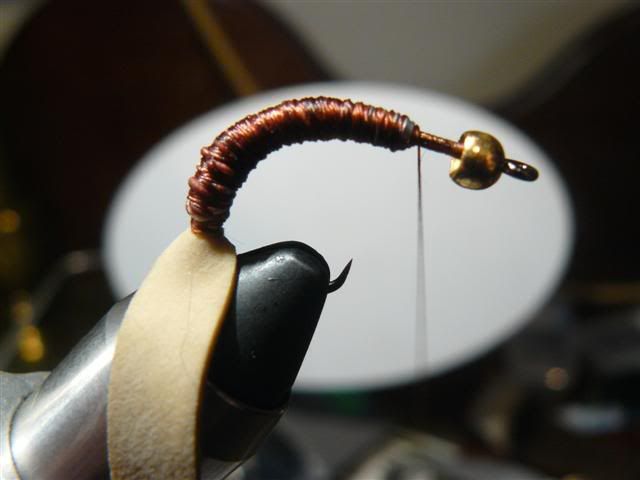
Page 1 of 2 1 2 LastLast
Results 1 to 10 of 17

Thread: Rubber Band Control Caddis

  1. #1
    Join Date
    May 2007
    Location
    Parys, Free State
    Posts
    9,760

    Default Rubber Band Control Caddis

    Hook:Mustad Circle size 1
    Bead:4mm Tungsten Gold
    Thread: Danville 210 denier
    Thread:Brown 14/0
    Lead Wire:0.030inch
    Body:Office rubber band
    Overstrips/Wingcase:Brown nymph skin
    Thorax:Chocolate Brown Hare's Ear dubbing
    Legs:Brown Deer Hair tips
    Marker for Body:Chartpak Dessert Tan
    Marker for wingcase:Chartpak Delta Brown

    Step 1
    Debarb hook,slide bead over and insert the hook into the vice.Add ur 210 denier or 3/0 thread by the bead,do consecutive wraps back to the bend.


    Step 2
    Add some glue to the wrappings from the bead to the bend.


    Step 3
    Take a ruler and flatten the lead wire before tying it in.


    Step 4
    Add the lead wire by starting at the bend,winding it forward in closely wrapped turns to the thorax area.Leave a small gap from the end of the thorax going forward and the bead.We'll sort this gap out later.


    Step 5
    Cut a "v" into the rubber band before tying it in.


    Step 6
    Tie in the v-shaped rubber band so that the point of this v face upwards to the point where the hook starts to straighten.Why?You're wrappings will be done ANTI CLOCKWISE.Remember to pull very tight ALL the time hence the thicker thread.Also,try and pull the rubber as hard and tight as possible all the time.


  2. #2
    Join Date
    May 2007
    Location
    Parys, Free State
    Posts
    9,760

    Default

    Step 7
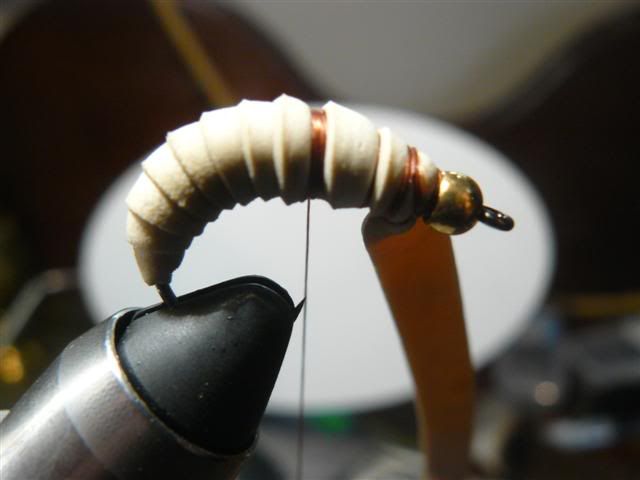
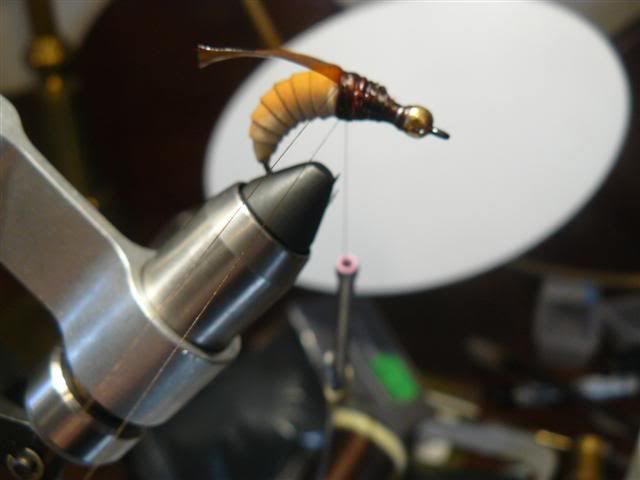
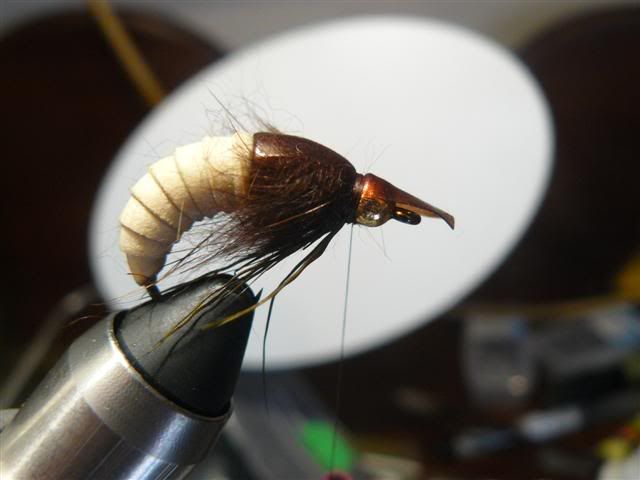
    Wrap the rubber forward untill u reach the bead.Tighten the rubber as hard and tight as possible.Then move your thread back over the rubber band till u reach the end of the lead wire.(Remember u have a gap here,end the thread on top of the wire.Now u should pull like a madman to secure that rubber.
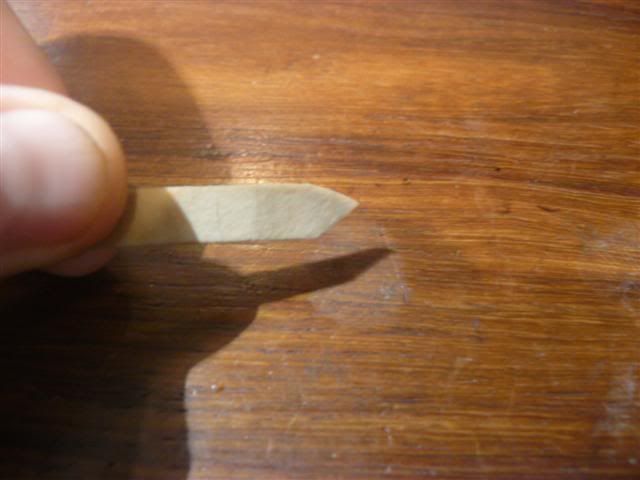


    Step 8
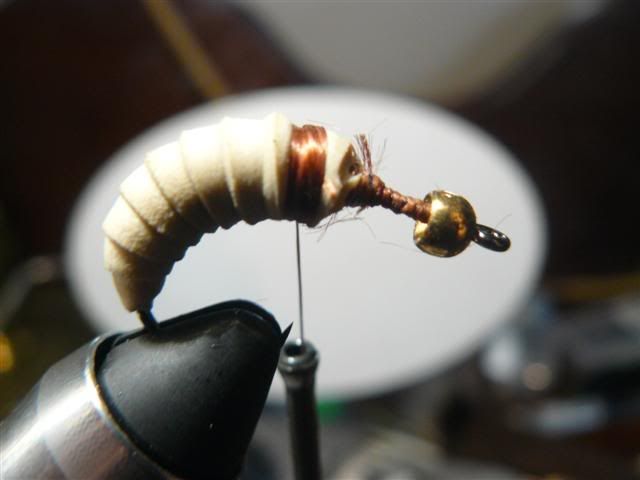
    Use a sharp blade and cut the rubber that is directly on top and around that gap I was talking about earlier.Remember to leave a little bit of rubber,don't cut it to short.Too short a cut will result in the whole body coming loose.
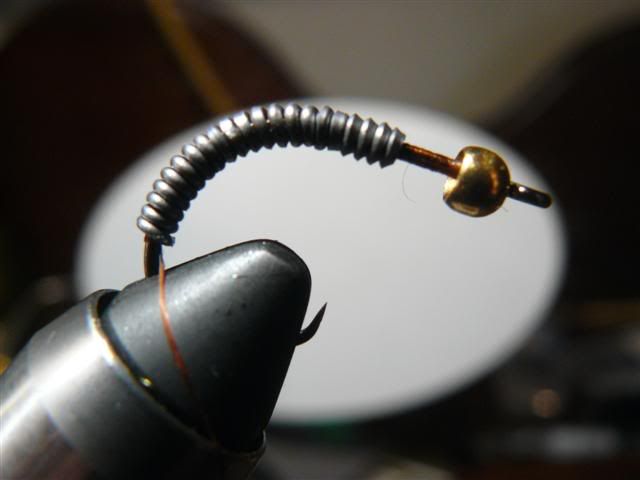
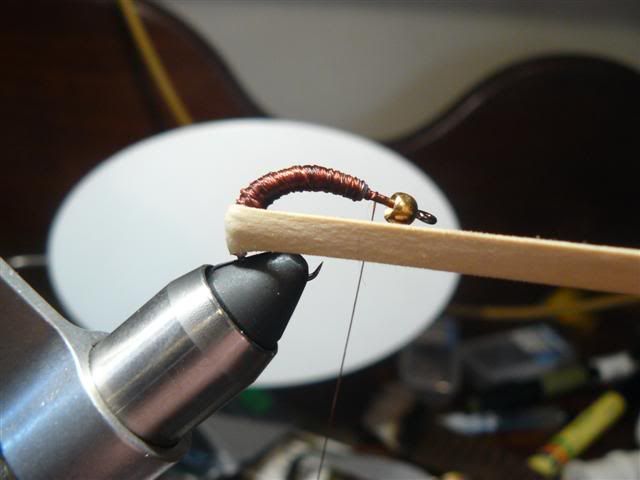
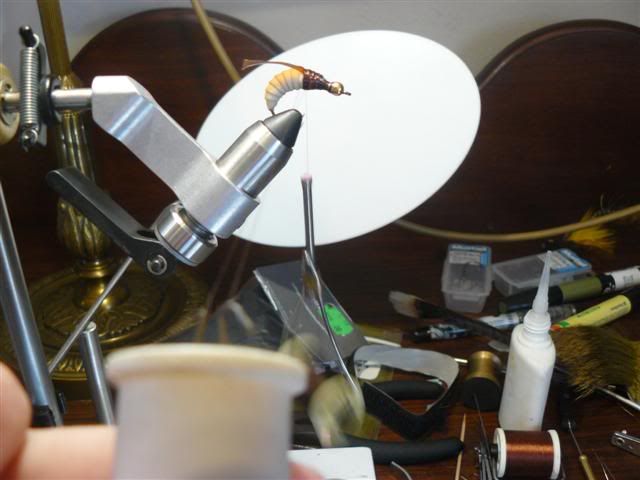
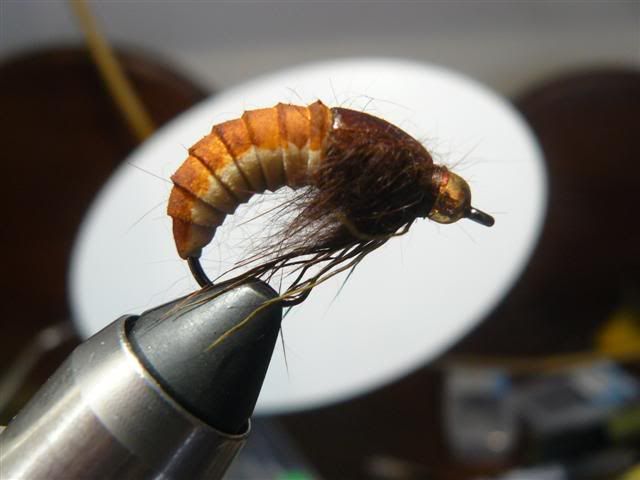


    Step 11
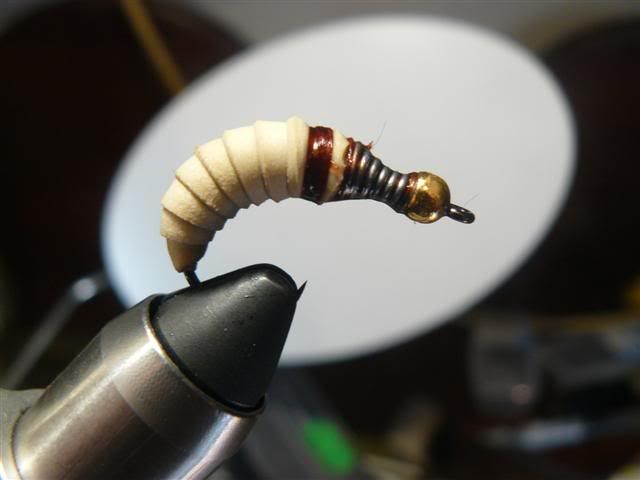
    Add some glue to the gap and thread wrappings that u used to secure the rubber.Also,now add some more lead wire to that gap till u reach the bead.Whip finish and tie of this thick thread.
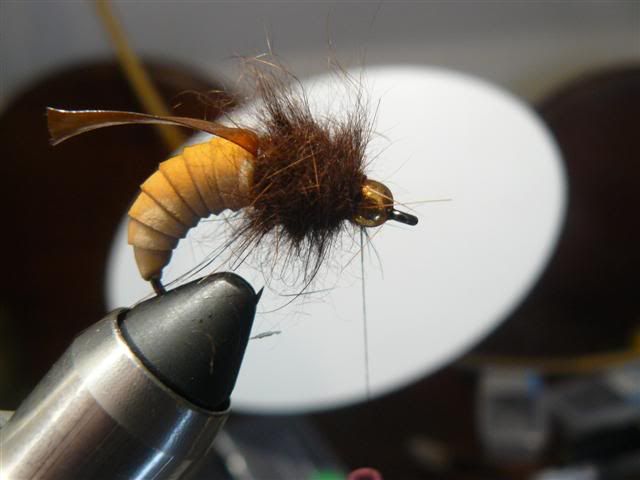
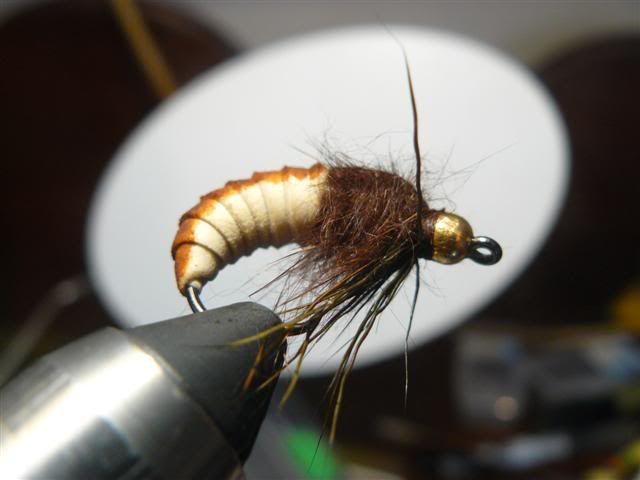


    Step 12
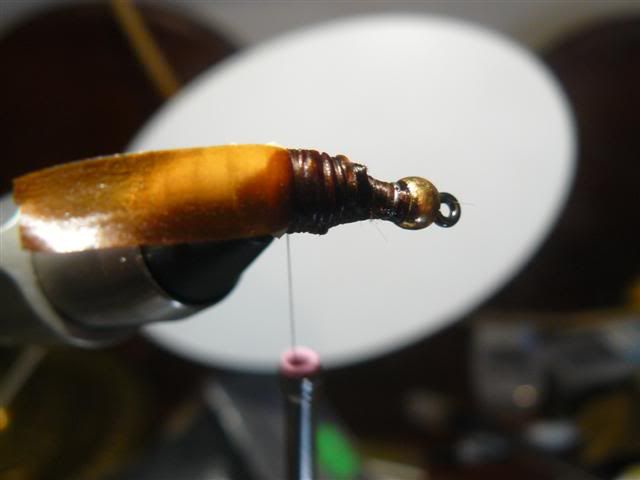
    Add ur brown 14/0 thread and tie in the wingcase.


    Last edited by Gerrit Viljoen; 28-07-08 at 10:53 AM.

  3. #3
    Join Date
    May 2007
    Location
    Parys, Free State
    Posts
    9,760

    Default

    Step 13
    Form a dubbing loop,insert your twister and hold it with ur left hand.
    Move your tying thread to the bead.Add some choc brown dubbing,twist the whole lot and wrap it forward to the bead.Tie of dubbing loop and let your tying thread hang.


    Step 14
    Turn your jaws upside down and tie in a few brown Deer Hair strands.This will be your legs.


    Turn it back up


    Step 19
    Pull your wingcase over,do a few wraps,whip finish and tie off.Clip excess skin and add some head cement.


    Step 20
    Now comes the coloration.Dessert tan for the top of the caddis body and Delta Brown for the wingcase.DO NOT color the abdomen of this fly.Once you've done the markings,you're almost done.Tease out some of the dubbed thorax hairs,getting rid of any unwanted loose hair.


    Last edited by Gerrit Viljoen; 28-07-08 at 12:27 PM.

  4. #4
    Join Date
    May 2007
    Location
    Parys, Free State
    Posts
    9,760

    Default

    Bottom view

    Last edited by Gerrit Viljoen; 28-07-08 at 12:49 PM.

  5. #5
    Join Date
    May 2007
    Location
    Cape Town
    Posts
    1,956

    Thumbs up

    Gerrit, that really does look great! Thanks!
    Around the steel no tortur'd worm shall twine, No blood of living insect stain my line;
    Let me, less cruel, cast feather'd hook, With pliant rod athwart the pebbled brook,
    Silent along the mazy margin stray, And with fur-wrought fly delude the prey

  6. #6
    Join Date
    May 2007
    Location
    Parys, Free State
    Posts
    9,760

    Default

    Quote Originally Posted by FishWhisperer View Post
    Gerrit, that really does look great! Thanks!
    Pleasure Matt,

    I tie them in Olive and Salmon pink as well.The success IMO of this fly is the thicker and wider rubber.The segentation is unbelievable.

    Also,a packet of these rubbers will set u back only R7 for 100 bands.What I also like is the neutral color of the rubber bands.They take any colored marker really really well.

    G
    Last edited by Gerrit Viljoen; 28-07-08 at 10:51 AM.

  7. #7
    Join Date
    Sep 2006
    Location
    Sunninghill JHB
    Posts
    2,262

    Default

    Nice looking fly...
    But I could never tie on a desk that looks like that... too much clutter, just me.
    Mike McKeown

    You're either fishing or waiting...

  8. #8
    Join Date
    May 2007
    Location
    Parys, Free State
    Posts
    9,760

    Default

    Another helpful tip I can give....If u don't have a dubbing twister make ur own.

    Take an empty spool of thread,insert one of them paper clips into the hole of the spool and bend the ends of the clip to the desired angle.

    Fill the gap with epoxy,let dry and start spinning

    G

    Ps.I chose to epoxy 2 spools together instead of just one.I have big hands.

  9. #9
    Join Date
    Sep 2006
    Location
    Midrand
    Posts
    1,294

    Default

    Nice one Gerrit, does the elastic affect the sink rate at all?
    "I'm just a beer drinker with a flyfishing problem"

  10. #10
    Join Date
    May 2007
    Location
    Parys, Free State
    Posts
    9,760

    Default

    Quote Originally Posted by rory View Post
    Nice one Gerrit, does the elastic affect the sink rate at all?
    Hi Rory,

    I suppose it does a little bit,this is def not one of the heavest Controllers around.U can add another smaller tungsten bead at the thorax area,thinner lead and more wraps.

    But either way,u HAVE to pull that rubber as hard as possible to make it more slender.This fly is still heavy enough for the majority of times.

    G

Page 1 of 2 1 2 LastLast

Bookmarks

Posting Permissions

  • You may not post new threads
  • You may not post replies
  • You may not post attachments
  • You may not edit your posts
  •