Results 1 to 5 of 5

Thread: DIY Rod Wrapper & Drying Stands

  1. #1
    Join Date
    May 2007
    Location
    Gauteng
    Posts
    6,299

    Default DIY Rod Wrapper & Drying Stands

    Thought I'd start a new thread, for Mark...here's a simple rod wrapper and drying stand DIY project. I still use this set-up today...easy to make, easy to use, works 100%.

    All you need is the following:

    For rod wrapper:
    22mm x 110mm pine boards
    3 x 8mm flat-head bolts, 95mm total length (for thread spools...not full thread if possible)
    3 x 8mm Springs (for thread spools, tensioning)
    6 x 8mm large round washers (for thread spools)
    5 x 8mm Wing-nuts
    2 x 8mm full thread bolts (for wrapper stands, moving section)
    2 x 8mm Square washers, thick
    2 x 8mm round washers
    Section of 90 deg angle Aluminium tracks
    Small self-tapping screws
    Round rubber washers
    5-minute epoxy
    Wood glue
    Green felt (can get at any material shop...they use it on pool tables, etc)
    few small nails
    Wood Dowels
    big elastic bands
    long material elastics (like they use for underpants! ) Can get from material shops
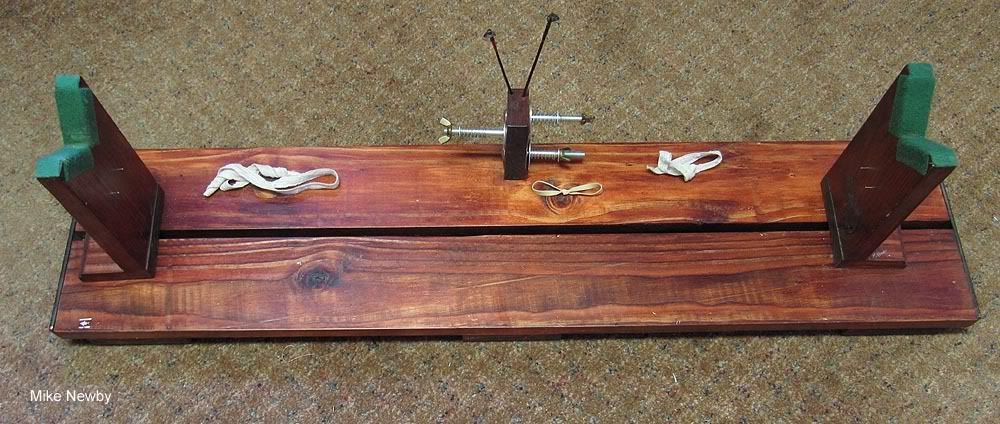
    For drying stands:
    Same wood, same felt, same dowels, same rubber washers, same epoxy & some wood glue
    Plastic cup
    big rubber bands
    dowels or bolts for securing rubber bands on cup
    Old microwave motor (and it's turning mechanism)
    Electric cable & plug

    Here's the wrapping stand, complete: (Make sure the gap between the thread-spool holder and the movable stand is big enough so the movable stands can move past the thread-holder. These movable stands must be able to move completely from right to left, and even be able to stand right in front of the thread holder, right in the centre.


    Close-up of the movable stand: (use the dowels and wood glue to make the stand itself, very simple). Cut a "V" in the top, glue the felt into the V with a little thin film of wood glue.


    The underside of the wrapper, showing the "track" the stands move in. Use the square washer, and epoxy the full-thread 8mm bolt into it. The aluminium track prevents the square washers from turning, when you tighten the wing-nut on the other side on the stands' foot.


    The components of the movable stand's securing mechanism: (8mm bolt epoxied into square washer, 8mm round washer glued onto the stand's foot, 8mm wing-nut.


    Push the bolt through from underneath, put the stand's foot on, secure with wing-nut:


    The thread holder. Glue the flat-head 8mm bolts to the holder. (Drill holes right through, but the bolts through, glue them in place). Glue some flat round washers to the one side. Your thread spool goes onto the bolt, then you put the other big round washer on, then the spring, then a small round washer, then the wing-nut. That's your tensioning device. The rubber band I put on if the thread spool's moving causes the nut to start turning and self-tightening. The rubber band just keeps the nut from moving, and your tension remains as you set it.


    More to follow...
    Last edited by Michael; 04-09-11 at 08:50 AM.

  2. #2
    Join Date
    May 2007
    Location
    Gauteng
    Posts
    6,299

    Default

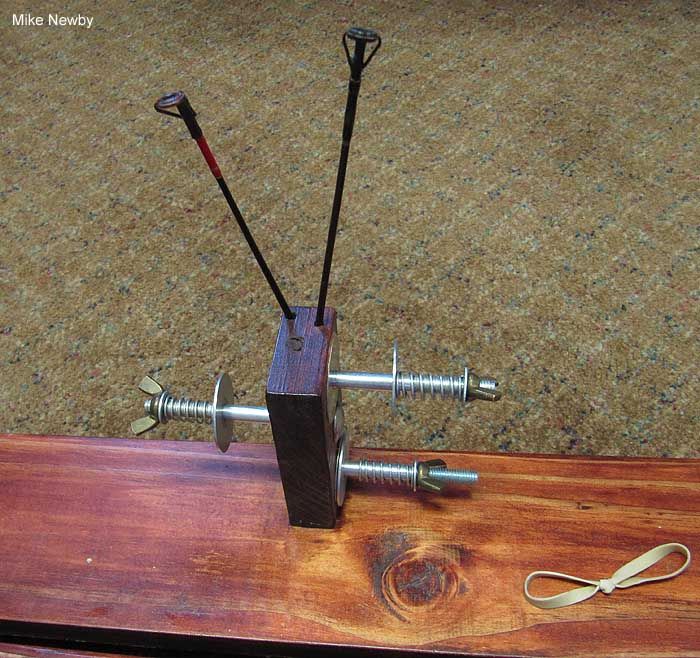
    In the previous pic you'll see I drilled two holes in the top of the thread holder, at slight angles. That is for old rod-tips...I put those in, and the thread comes off the spool then, up through the rod-tips, and then down to the rod blank you are working on. This gives you good control over the thread tension should you move back a turn or so, plus provides the correct angle for the thread coming down to the blank, from the rod-tips. (You can even use piano wire (even better), and glue rod tips to it. Or very stiff wire, whatever...make a plan...as they say).


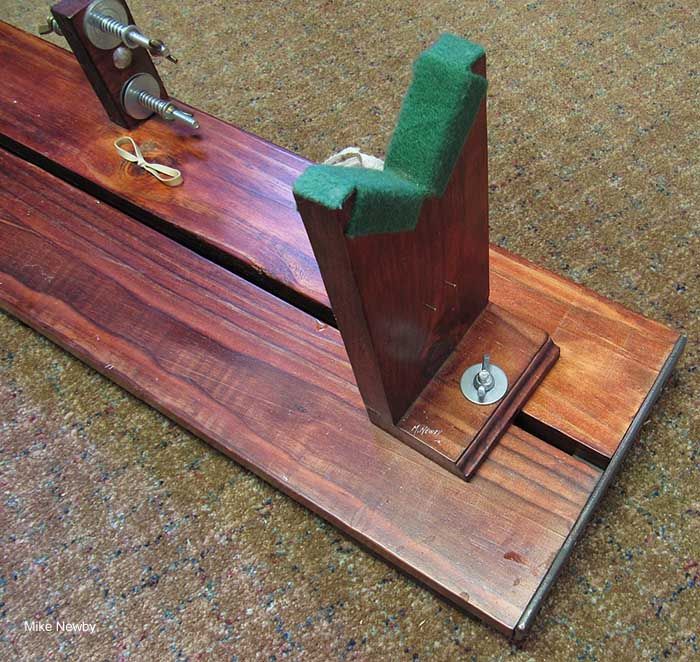
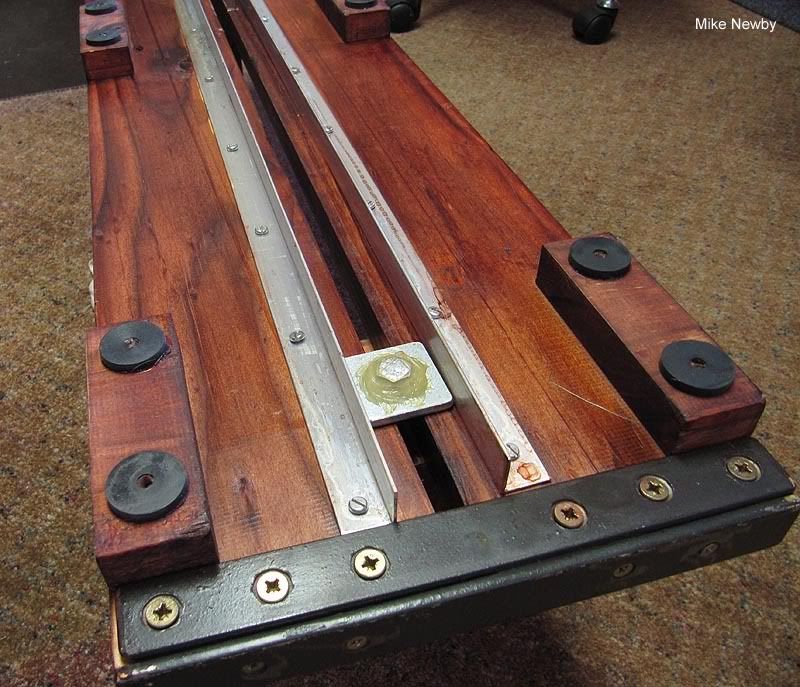
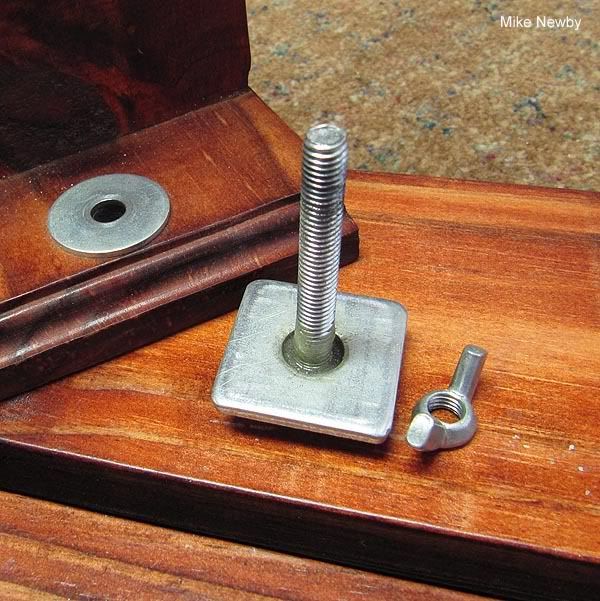
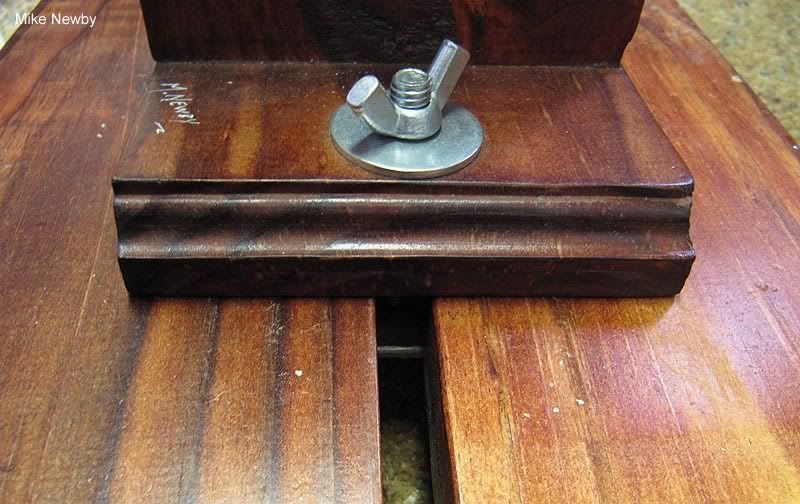
    Another pic of the movable rod stands, and the track they move in:


    DRYING STANDS:
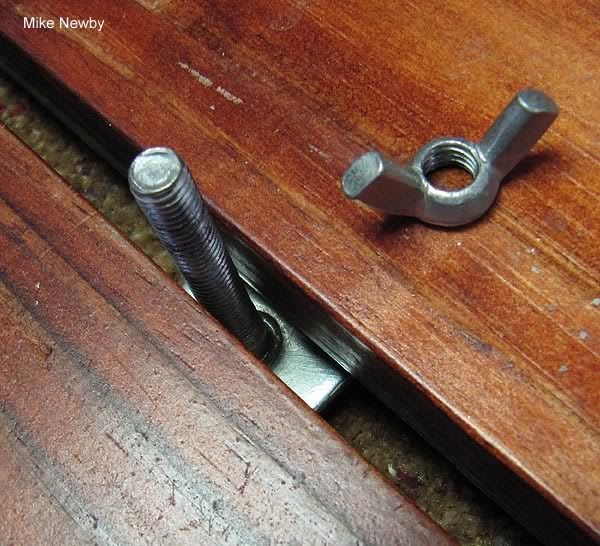
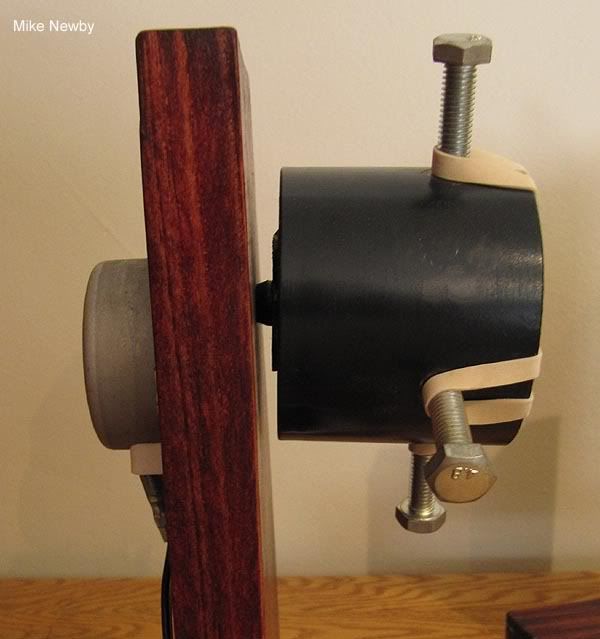
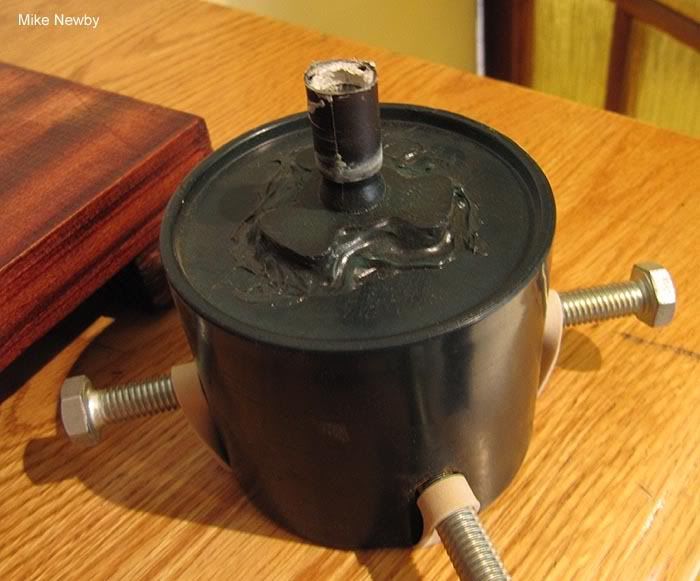
    I drilled holes through the sides of the cup, epoxied 8mm nuts to the inside, and then screwed in 8mm bolts, with rubber cups glued to the bolts ends. Then I could secure a rod by turning the bolts in. But, since then I don't use that method anymore...just put thick rubber bands on, and then slip the rod's butt through the centre. The rubber bands grip the rod butt securely and turns the rod. Works 100%. So you can just really glue a few dowels into the cup, to hold the rubber bands as shown.


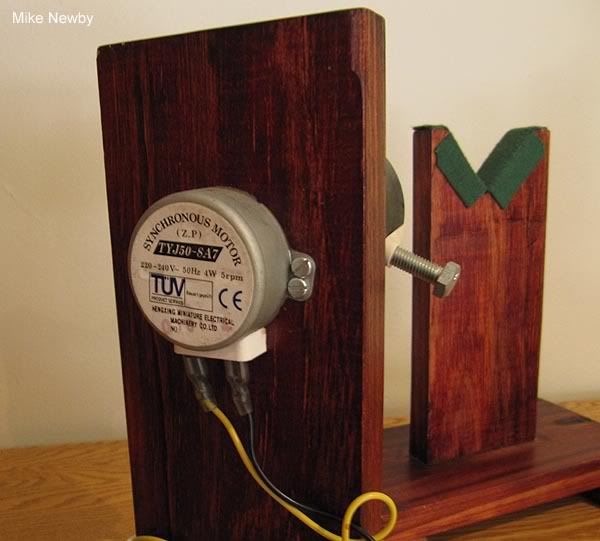
    a Hole is drilled right through the stand, and the mocrowave motor is secured to it, with it's shaft going through the hole.


    I epoxied the microwave motor's table stand (that brown female ferrule jobbie that makes the table turn) to the plastic cup. Don't glue it onto the motor's shaft...just use prestik te secure it in. You want to be able to take it off, just in case. If you really want, you can glue it together...just know, that should the motor burn out (never happened to me yet, touch wood) you can remove the cup and replace the motor.


    That's a very simple way to make drying stands. Make more than one seperate stand (I use two), then you can put the entire rod in the drying stand. The motor side holds the butt section, one seperate stand holds the centre of the rod just before the second rod ferrule, and then another seperate stand to hold the rod at the tip side.
    When making these seperate stands, make sure the "V" in them lines up 100% to the centre of you motor's shaft, of course...so the rod is level when you have in in the set-up and drying.
    Last edited by Michael; 03-09-11 at 02:40 PM.

  3. #3
    Join Date
    May 2007
    Location
    Gauteng
    Posts
    6,299

    Default

    Just to clarify...here's the microwave motor's connection, that I epoxied onto the plastic cup. (Rough up both surfaces and use strong 5 minute epoxy. Make sure it's dead centre too).
    PS: The cup you use...make sure it's nice and deep, in case your rod has a long fighting butt, so it will fit in nicely.


    The motor's shaft, in the hole. Then take the cup and press it on (I use prestik to hold it on securely. (Just in case I need to take the cup off again). You can of course glue it on, if you like. But then if the motor goes, you need to make a new stand, cup, etc.

  4. #4
    Join Date
    Jan 2007
    Location
    Cape Town
    Posts
    9,050

    Default

    Thanks Mike
    Some clever ideas.
    Korrie Broos

    Don't go knocking on Death's door, ring the bell and run like hell. He hates it. (anon)
    Nymphing, adds depth to your fly fishing.
    Nymphing, is fly fishing in another dimension

  5. #5
    Join Date
    Dec 2009
    Location
    Cape Town, Western Cape
    Posts
    1,327

    Default

    Mike has provided a lot of good information here.. First things first though.. Build your jigs and go from there. Just decide on something as there are many jigs out there..

    I posted pics of my jigs which I recently built under the other link - Rod Wrapper: http://www.flytalk.co.za/forum/showt...906#post200906

    Lakka
    Fly fishing, fly tying & rod building.....

    http://www.flytalk.co.za/forum/album.php?u=2531

Bookmarks

Posting Permissions

  • You may not post new threads
  • You may not post replies
  • You may not post attachments
  • You may not edit your posts
  •